Self-Hosting on Google Cloud
Overview
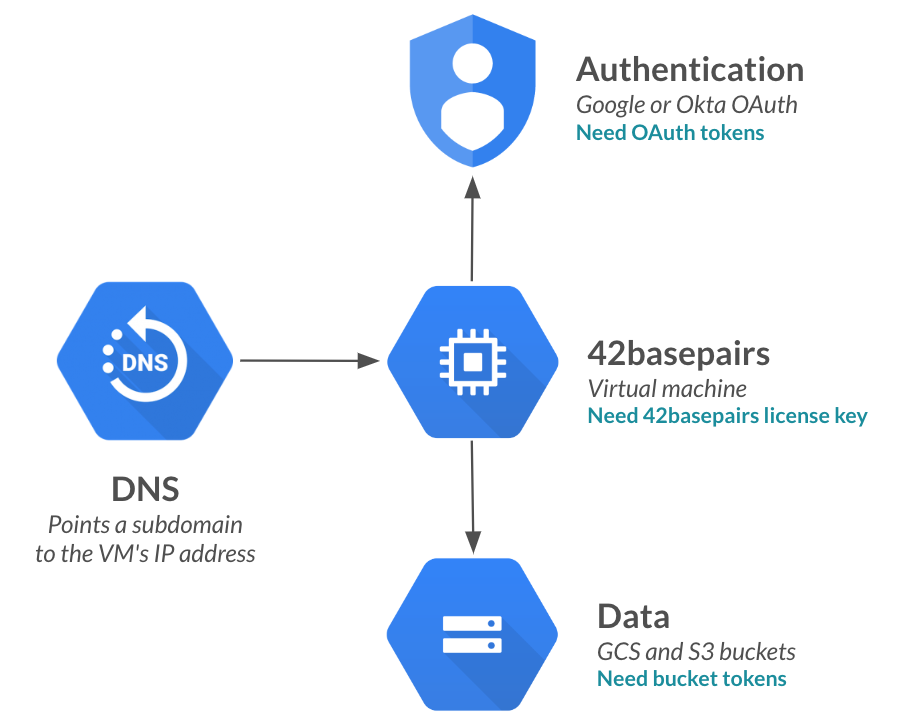
42basepairs runs on one Virtual Machine (VM) and uses read-only tokens to connect to your buckets:
In this guide, we'll set up this architecture and create the necessary tokens to get you up and running!
Before you start
First, make sure you have the following ready:
1. Decide which domain 42basepairs will be hosted on, e.g. 42basepairs.company.com.
2. You will need permissions to access that domain's DNS dashboard to add a new DNS record.
3. Within the Google Cloud project that contains your buckets, make sure you can reach the Service Account page and the OAuth Consent Screen settings page. If you get errors about not having access, contact your IT department to get access.
Installation Steps
Step 1: Gather some information
1. Your 42basepairs license key:
2. Enter your work e-mail domain:
@company.com emails will be able to log in3. Where should 42basepairs live?
4. Enter your email. This will be used to create the first admin account:
5. Which cloud region should 42basepairs live in? Choose the same region as where your buckets live to reduce your egress costs (it's generally cheaper or free to transfer data from a bucket to a VM in the same region, but there are exceptions if the cloud bucket is multi-region):
Step 2: Create a VM
Next, let's create the VM that will host 42basepairs:
1. Go to your Google Cloud Console
2. Choose the project you want 42basepairs to live in. This can be different than the project where your data lives.
3. Launch the Cloud Shell from the top right navigation bar—look for the icon.
4. Create a static IP address that we will attach to our new VM. This is to make sure that restarting the VM doesn't change the IP address of the app!
gcloud compute addresses create ip-42basepairs --region=us-central1
5. Create a VM using that IP address:
gcloud compute instances create vm-42basepairs \
    --zone=us-central1-b \
    --machine-type=e2-medium \
    --no-service-account \
    --no-scopes \
    --tags=http-server,https-server \
    --create-disk=auto-delete=yes,boot=yes,device-name=disk-42basepairs,image=projects/debian-cloud/global/images/debian-12-bookworm-v20240312,mode=rw,size=50,type=pd-ssd \
    --address=ip-42basepairs
6. Note down the IP address of the VM:
gcloud compute addresses describe ip-42basepairs \
    --region=us-central1 \
--format 'get(address)'Step 3: Install 42basepairs
Now let's install 42basepairs on that VM:
1. Within Google Cloud Shell, SSH into the new VM:
gcloud compute ssh --zone=us-central1-b vm-42basepairs
2. Once inside, define environment variables with the info you entered above:
export LICENSE_KEY="null"
export DOMAIN_42BASEPAIRS="42basepairs.company.com"
export DOMAIN_AUTH="company.com"
export SITE_ADMIN_EMAIL="[email protected]"
export IP_ADDRESS=""
3. Run the installation script:
bash <(curl -s https://42basepairs.com/on-prem/install.sh)
3. Follow the instructions to complete your installation!